
🔥Let's Do DevOps: Azure DevOps YML Terraform Pipeline and Pre-Merge Pull Request Validation

This blog series focuses on presenting complex DevOps projects as simple and approachable via plain language and lots of pictures. You can do it!
tl;dr: Here’s YML code that will build an Azure DevOps pipeline that can be run automatically as part of pull request validation (pre-merge) and requires manual approval by definable admin groups in order to proceed to modifing resources.
Microsoft’s Azure DevOps (ADO) is an incredibly powerful CI/CD platform that is being rapidly developed by $MSFT. However, as with any rapidly-evolving product, the documentation sometimes leaves something to be desired. I solved a few problems with the help of the Azure DevOps development team and I thought I’d share my solutions. Hope they help.
ADO is generalized to be able to run any language you’d like, rather than being committed to a single language like HashiCorp’s Terraform Enterprise (Terraform only) and can drive your own machines already embedded in your infrastructure, rather than requiring you to use their hosts.
It also permits something many other CI/CDs do, which is writing our pipelines in YML format, and tracking and updating their config via the text YML config. This is powerful for several reasons:
As with every other DevOps resource, tracking state and changes in text and with pull requests allows peer review before changes and identification of changes afterward
Despite a powerful GUI configuration interface, code will always have more options for configuration
Hundreds of pipelines can be much more easily managed in code than via any kind of GUI

Azure DevOps: The Old Way
I previously configured our Terraform pipelines within Azure DevOps using the GUI. I didn’t realize until after that once configured in the GUI, the pipelines are no longer convertible to YML, so we were stuck with the GUI version. And then we needed another and another, and suddenly I’m managing nearly a hundred GUI-based pipelines, and things are obviously becoming untenable.
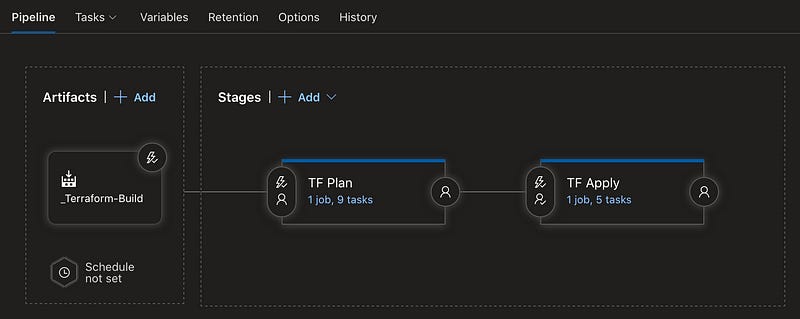
Each pipeline has several stages — first, we have a build pipeline that generates artifacts (a collection of files in our terraform repo) based on pull requests against our terraform repo.

Once artifacts are built, they are published and ingested by our many pipelines. These pipelines are configured to be triggered to automatically run our first stage, terraform plan, and then hold. The second stage shouldn’t be run until approved, for obvious reasons.
Each of these stages is built by hand, and managed by hand. We have a step each run that installs terraform for easily updating our build agents or targeting specific terraform binary versions per pipeline run. This is great at the back-end but on the front end each time we want to update Terraform’s version or add a step to any of these pipelines we end up opening several hundred windows and manually updating a variable. Definitely not scaleable.

An unrelated-to-functionality but a still quirky bug is that release pipelines are clearly “the old way” to ADO’s dev team also — new features are being quickly added to the pipeline feature-set, and release pipelines have and keeps bugs. It’d be a wise move by anyone to adopt Pipelines for their business as soon as reasonable.
Azure DevOps Pipelines: The New Way
Thankfully Azure DevOps is a product under frequent development, and along came some features which can help us achieve the same functionality but manage our pipelines via code.
The most difficult parts of our journey are the features we got used to release pipelines-land and didn’t want to give up.
The first, we have a simple requirement for each of our terraform pipelines — in order for pull request validation to work we want ONLY the validation/terraform plan step to run when the pipeline is triggered via a pull request. That turned out to be a more difficult request that we assumed.
Second, we wanted the second stage of our pipelines — the terraform apply step to require special, manual approval. That functionality is incredibly hit or miss at this point among CI/CDs. GitHub actions won’t even permit manually running a pipeline yet, so clearly most development is based around entirely automatic actions and webhooks, rather than manual approvals. But I’m an Ops person by training, so darnit, I want an approve button.
Let’s talk about each problem and how we solved it in turn.
Pull Request Validation: Only Stage 1, Not Stage 2
We want to test our code as much as possible before merging it into master. This helps us avoid more complex strategies, like having a dev → stage → prod branch strategy in place. Terraform validation isn’t perfect, but it’s something.
Azure DevOps supports this well — it permits build pipelines to be executed when a pull request is opened against certain branches (usually master branch). The artifacts that are built can flow into release pipelines that can test the code with terraform validate and terraform plan, and any other validation code you can run against it.
YML pipelines support this also, but in an unintuitive way. You’re required to write a conditional command that identifies the type of action that triggered the build request and filter it. We want to both:
Only run the
Terraform Applystage when the first stage (Terraform Plan) succeeds ANDExecute the stage in all situations EXCEPT when it is executed by a pull request (since we’ll execute this pipeline, but don’t want this particular STAGE to run)
To solve this problem we wrote a conditional on this stage that looks like this:
condition: and(succeeded(), ne(variables[‘Build.Reason’], ‘PullRequest’))Here’s the conditional in context:
| - stage: Terraform_Apply | |
| jobs: | |
| - deployment: Terraform_Apply | |
| displayName: Terraform Apply | |
| pool: $(pool) | |
| continueOnError: 'false' | |
| # Run this stage if previous stage(s) succeeded and build reason ISN'T a pull request | |
| condition: and(succeeded(), ne(variables['Build.Reason'], 'PullRequest')) |
With that solved, now we need to require approval on stage 2.
Manual Administrative Approval
When we built this pipeline on paper we didn’t think this would be a problem. Do stage 1, then wait for someone to hit an approval button, then do stage 2. It turned out to be more difficult than that in our YML-ized pipeline world.
The Microsoft solution to this problem is called an Environment. The trick to understanding the word environment in this context is that it doesn’t mean anything like “environment”. It’s unrelated to where the code is run.
As far as I can tell, the reason the word environment is used is because Microsoft’s best-practice use-case is to roll code forward through different “environments” like dev, stage, prod, with each stage requiring different approvals. That’s not how I’m using it here, but the functionality satisfies my requirements.
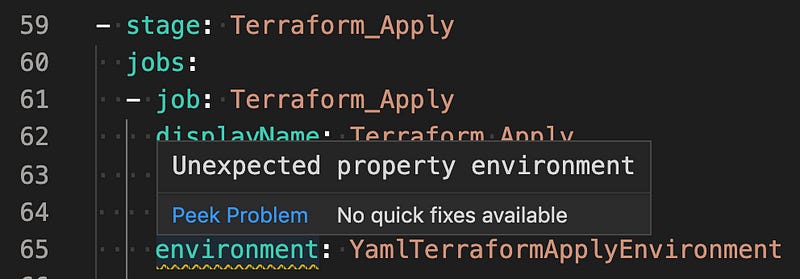
We initially had our code in the following layout and were instructed to add the environment variable to the job.
stages:
- stage: Terraform_Apply
  jobs:
  - job: Terraform_Apply
    displayName: Terraform Apply
    pool: $(pool)
    continueOnError: 'false'
    environment: YamlTerraformApplyEnvironment
Which clearly didn’t work — we received the following error in the online editor. Environment came out in mid-2019, so somewhat recently, but not that recently that I’d expect our tenant is on an older version that doesn’t have this preview yet.
We eventually came upon the problem: We were using an older standard of how the YAML should be laid out. The new model, which uses the keyword “deployment” instead of “job” permits environment. This doesn’t seem to be documented and took some good long google searches to find. The new format looks like this:
| - stage: Terraform_Apply | |
| jobs: | |
| - deployment: Terraform_Apply | |
| displayName: Terraform Apply | |
| pool: $(pool) | |
| continueOnError: 'false' | |
| # Run this stage if previous stage(s) succeeded and build reason ISN'T a pull request | |
| condition: and(succeeded(), ne(variables['Build.Reason'], 'PullRequest')) | |
| environment: 'YamlTerraformApplyEnvironment' |
That new format discouragingly made our steps invalid. However, it turns out the deployment model of YAML permits multi-step stages, the formatting just has to be different. So that became this:
| - stage: Terraform_Apply | |
| jobs: | |
| - deployment: Terraform_Apply | |
| displayName: Terraform Apply | |
| pool: $(pool) | |
| continueOnError: 'false' | |
| # Run this stage if previous stage(s) succeeded and build reason ISN'T a pull request | |
| condition: and(succeeded(), ne(variables['Build.Reason'], 'PullRequest')) | |
| environment: 'YamlTerraformApplyEnvironment' | |
| strategy: | |
| runOnce: | |
| deploy: | |
| steps: | |
| - checkout: self | |
| - task: charleszipp.azure-pipelines-tasks-terraform.azure-pipelines-tasks-terraform-installer.TerraformInstaller@0 | |
| displayName: 'Install Terraform' | |
| inputs: | |
| terraformVersion: $(terraform_version) | |
| - task: DownloadSecureFile@1 | |
| (etc.) |
That format thankfully worked, and also permitted us to use “environments”.
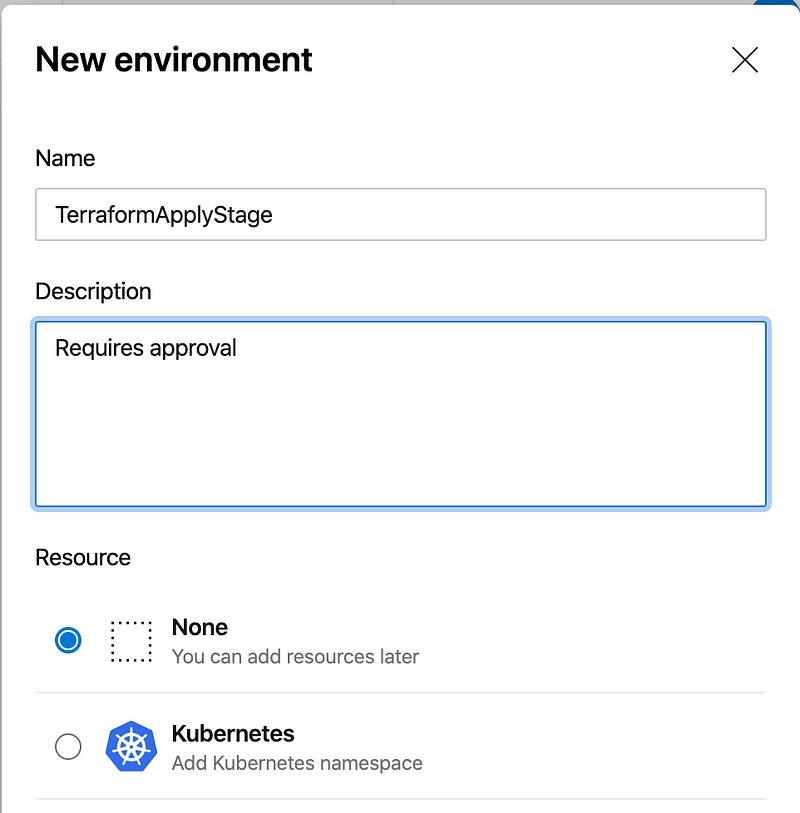
Create an Environment
You’ll find environments under the pipeline block in the left column of Azure DevOps.

Click Create to start building a new environment. Give it a meaningful name and any description you’d like. We’re not using Kubernetes here, so use Resource = None, and then create your new environment.
In the top right of your environment click on the three dots, and then on Approvals and checks.

ADO has a helpful hint in the center of the page that we can add our first check, as well as a cute dog that I’m including because cute dogs are important, too. Click on “Approvals” in the center-right.

Add any approvers you want. I only have the single user in my personal lab environment, so I’ll add myself. The rest of the options I’ll leave default, but showing them for completeness’ sake.

Click Create, and now your environment exists, and any YML pipelines which specify it will hang and wait for approval from anyone listed. The approval logic is still relatively rudimentary compared with what release pipelines support natively, but I’m sure more complex approval logic is coming!
Enable Multi-Stage Pipelines Preview Feature
We also had to make sure our preview feature of Multi-stage pipelines was enabled. It was by default in my personal tenant but is apparently still in preview, so it is listed here.

Make sure to enable the button for Multi-Stage pipelines or the YML pipeline won’t be recognized as valid in your tenant.

Build our Terraform Pipeline
Let’s create our YML Terraform pipeline. First of all, copy down this GitHub repo to download the YML pipeline.
KyMidd/AzureDevOps_TerraformPipeline_YML
You can't perform that action at this time. You signed in with another tab or window. You signed out in another tab or…github.com
You may need to update the YML to remove references to the pool and any secure files that you wouldn’t have in your own environment. Those are included as examples of what the YML can do but probably won’t work in your lab without you building identical resources.
Commit the YML to your terraform repo somewhere. I usually build a folder called “pipelines” and put the pipelines all in there with descriptive names. For this demo, I put the YML file in the root in the master branch.
Then find the pipelines block in the left and click it.
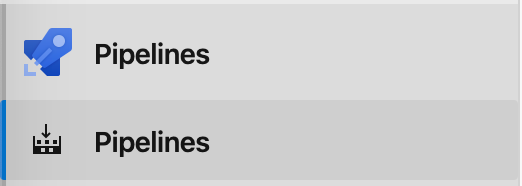
In the top right, click the “New pipeline” to start the process.

ADO guides us through a pretty great wizard. Select that your code lives in the Azure Repos Git.

Choose the repo, then choose that you’ll use an existing Azure Pipelines YML File.

Find the .yml file you committed to your repo.

Hit “Run” as the last step, and your pipeline will be created.
Automatic Pull Request Verification
We now need to configure the pipeline to run automatically when a new PR comes in. Start by heading over to the branches page.

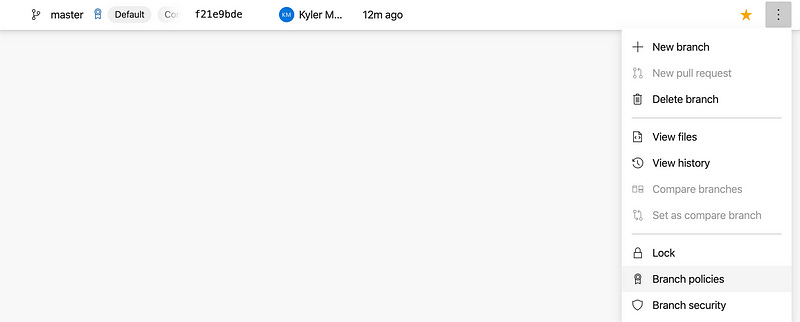
On the master branch, click on the three dots on the far right. If you don’t see them, hover over the line. Then click on “Branch Policies”.
Add a build validation policy. These use the information contained in the pull request and can run builds and pipelines to do verifications on code.

Find the build pipeline we created and set the trigger to Automatic. Also, set the Display name at the bottom to make life a little easier to read.

Summary
You now have a pipeline that is controlled by YML in source control, is capable of and configured for pull request validation pre-merge, and requires approval from specific people or teams in order to execute real changes. It’s a pretty sweet spot to be for an enterprise.
Good luck out there.
kyler